Imagine the slide of cold, raw fats against a stainless steel spatula; it is the ultimate tactile thrill for a maker. We are talking about that specific moment where the caustic bite of lye meets the buttery embrace of lipids to create something entirely new. Simple soap making is not just a weekend hobby; it is a high stakes chemistry experiment disguised as a spa day. When you have sensitive skin, the stakes get even higher because your moisture barrier is basically a high maintenance guest. We are stripping away the synthetic detergents and artificial fragrances that cause cellular distress. Instead, we are focusing on the molecular bond between oils and lye to create a bar that respects your skin's natural pH. Every stir of the whisk is a lesson in saponification, the chemical reaction where triglycerides transform into soap and glycerin. You can feel the mixture thicken as the emulsion stabilizes; it is a rhythmic, meditative process that turns raw, industrial materials into a luxurious, skin-soothing masterpiece.
THE STUDIO KIT
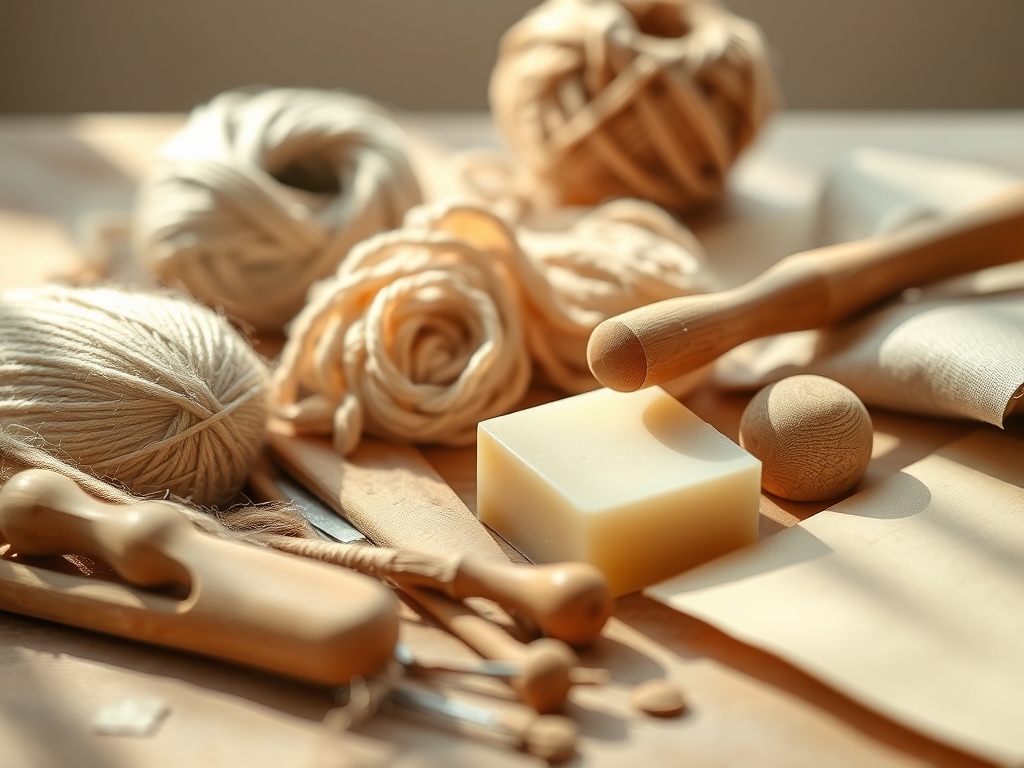
To master this craft, you need a kit that balances precision with protection. Your primary tool is a high quality immersion blender with a stainless steel shaft; plastic versions can degrade over time when exposed to high heat and caustic pH levels. You will also need a digital scale that measures to the 0.1 gram, as even a minor deviation in the lye-to-oil ratio can result in a "lye heavy" bar that is too harsh for the skin. For measuring temperatures, an infrared thermometer is essential for checking the thermal delta between your oil pot and lye pitcher without physical contact.
For the additives, we are looking for porous materials like clays and botanicals. You will need a fine mesh sieve to ensure your powders are free of clumps that could create "hot spots" in the final bar. If you are substituting materials, you can swap distilled water for aloe vera juice or goat milk, but remember that sugars in these liquids can cause a rapid thermal spike. Always have a silicone spatula on hand to scrape the sides of your vessel; its ergonomic flexibility ensures you do not waste a single drop of your precious emulsion.
THE TEMPO
The "Maker's Rhythm" is all about managing the induction period of the chemical reaction. You cannot rush the molecules. Phase one is the Preparation (30 minutes), where you measure every ingredient with the precision of a jeweler. Phase two is the Thermal Alignment (20 to 45 minutes), where you wait for your lye solution and oils to drop to a compatible temperature range, typically between 100 and 120 degrees Fahrenheit.
The actual Mixing Phase is surprisingly fast, often taking only 5 to 10 minutes of intermittent blending. Once the soap reaches "trace," you have a narrow window of about 5 minutes to incorporate your natural additives before the mixture becomes too viscous to pour. Finally, there is the Saponification Phase (24 to 48 hours) where the soap sits in the mold to harden, followed by the Curing Phase (4 to 6 weeks). During curing, water evaporates, the crystalline structure of the soap tightens, and the pH levels stabilize for a gentler finish.
THE CORE METHOD
1. The Lye Solution Synthesis
Begin by carefully adding your sodium hydroxide beads to distilled water. Never do this in reverse to avoid a "volcano" effect. Use a well ventilated space because the initial reaction is exothermic and releases steam.
Mastery Tip: This is a lesson in exothermic thermodynamics. As the lye dissolves, it releases energy in the form of heat. Use a stainless steel whisk to ensure every bead is dissolved; any undissolved lye crystals will create "stings" in the finished soap, compromising its structural integrity.
2. Melting the Lipid Base
Combine your hard fats like shea butter or coconut oil with your liquid oils like olive or avocado oil. Heat them gently until they are fully transparent.
Mastery Tip: Different fats have different fatty acid profiles. Saturated fats provide hardness and "tensile strength" to the bar, while unsaturated fats provide the conditioning properties essential for sensitive skin. Aim for a balanced blend to ensure the bar does not dissolve too quickly in the shower.
3. Achieving the Emulsion
Once both the lye and oils are within 10 degrees of each other, pour the lye into the oils. Use your immersion blender to pulse the mixture until it reaches "trace," which is the point where a drizzle of soap leaves a visible path on the surface.
Mastery Tip: This step relies on surface tension reduction. The blending process breaks the oil into microscopic droplets, allowing the lye to surround them and begin the saponification process. If you blend too long, the soap will become too thick to accept additives.
4. Incorporating the 6 Natural Additives
Now, fold in your skin-loving extras. For sensitive skin, we love: 1. Colloidal Oatmeal (soothes), 2. Kaolin Clay (cleanses gently), 3. Raw Honey (humectant), 4. Aloe Vera (hydrating), 5. Calendula Petals (anti-inflammatory), and 6. Goat Milk Powder (creamy lather).
Mastery Tip: When adding powders like clay or oatmeal, use a slurry technique. Mix the powder with a small amount of oil first to prevent clumping. This ensures a homogenous distribution of particles, preventing "drag" when the bar is used on the skin.
5. The Pour and Insulation
Pour the raw soap into your silicone molds. Tap the mold firmly on the counter to release trapped air bubbles. Cover the mold with a board or towel to keep the heat in.
Mastery Tip: This encourages the gel phase. By insulating the mold, you allow the internal temperature to rise, which results in a more translucent, vibrant bar. For sensitive skin, some makers prefer to skip this and put the soap in the fridge to prevent overheating and preserve delicate additives like honey.
6. The Unmolding and Slicing
After 24 hours, check the firmness. If it feels like a block of cheddar cheese, it is ready. Use a wire soap cutter or a sharp knife to slice the loaf into individual bars.
Mastery Tip: Use a caliper to measure consistent widths for your bars. Uniformity is not just for aesthetics; it ensures even drying during the curing process. A bar that is too thin may warp as water evaporates from its porous surface.
THE TECHNICAL LEDGER
Maintenance & Longevity: To keep your soap in peak condition, store it in a cool, dry place away from direct sunlight. Once in use, always place the bar on a draining soap dish. If the bar sits in a pool of water, the capillary action will draw moisture into the center, turning your hard work into a soggy mess.
Material Variations: For a premium version, use organic, fair trade butters. For a sustainable approach, look for RSPO certified palm oil or eliminate palm oil entirely by increasing the percentage of cocoa butter to maintain the bar's tensile strength.
The Correction:
- Soda Ash: A white film on top of the soap. Fix: Spray the top with 99 percent isopropyl alcohol immediately after pouring.
- Oil Seepage: Liquid oil pooling on top of the bar. Fix: This usually means the emulsion broke. Re-batch by melting the soap down and re-blending.
- Stearic Spots: Tiny white dots of un-melted hard fats. Fix: Ensure your hard butters are fully melted and integrated into the liquid oils before adding lye.
Studio Organization: Label your curing racks with the date and the specific "superfat" percentage. Use a bone folder to create neat parchment paper wraps for long term storage, which prevents the essential oils from migrating and protects the soap from humidity.
THE FINAL REVEAL
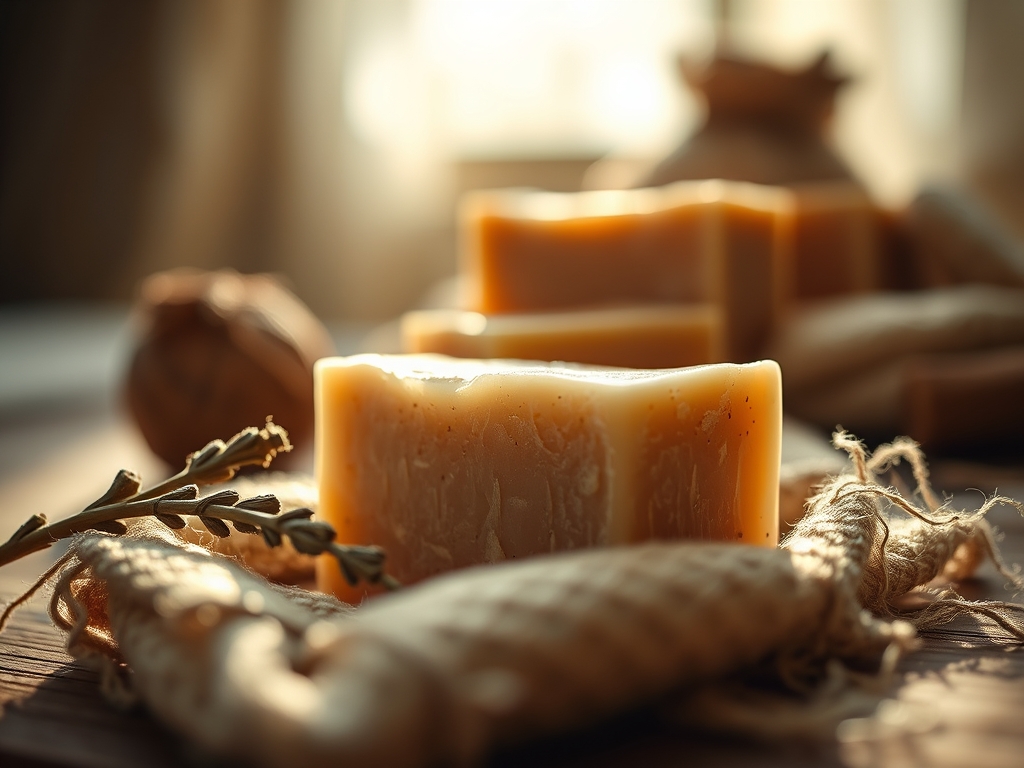
Look at that finish! A perfectly executed bar from your simple soap making session should have a smooth, matte texture and a heavy, substantial feel in the hand. When you rub it between your palms, the lather should feel dense and lotion-like rather than bubbly and airy. This is the hallmark of a high-fat, skin-sensitive recipe. You have successfully navigated the complex world of molecular chemistry to create a functional piece of art. The colors are earthy, the scent is subtle, and the impact on your skin will be transformative. You are no longer just a consumer; you are a formulator.
STUDIO QUESTIONS
Why does my soap feel soft after 24 hours?
This usually indicates a high percentage of liquid oils or excess water. Allow the soap to sit in the mold for an extra day; the tensile strength will increase as saponification completes and evaporation begins.
Can I use tap water for simple soap making?
Tap water contains minerals and "heavy metals" that can react unpredictably with lye. This can lead to "dreaded orange spots" or rancidity. Always use distilled water to ensure a chemically pure reaction.
What is a "superfat" and why does it matter?
A superfat is the percentage of extra oil left in the bar that does not turn into soap. For sensitive skin, a 5 to 7 percent superfat provides a protective lipid layer during cleansing.
How do I know if my soap is "lye heavy"?
Perform a "zap test" by touching the soap to your tongue; a static-like shock means it is lye heavy. Alternatively, use a pH strip; a reading above 10 indicates the bar is too caustic for skin.