
The scent of mercerized cotton is distinctive; it is the smell of high-pressure processing where cellulose fibers are treated with sodium hydroxide to increase their surface area and luster. As you run a strand between your fingers, you can feel the high tensile strength and the way the ply twist resists fraying. We are diving into the world of Simple Crochet Flowers today. These tiny structural marvels are more than just decor; they are exercises in tension control and geometric expansion. When you pull that first slipknot tight against a steel hook, you are engaging with a centuries-old tradition of portable architecture. Whether you are looking to embellish a denim jacket or create a delicate hairpiece, these patterns offer a fast-track to mastery. The physics of the stitch involves creating a series of interlocking loops that distribute force across the entire fabric, ensuring your floral accents remain crisp and three-dimensional. Grab your favorite yarn and let us transform a linear thread into a blooming masterpiece.
THE STUDIO KIT
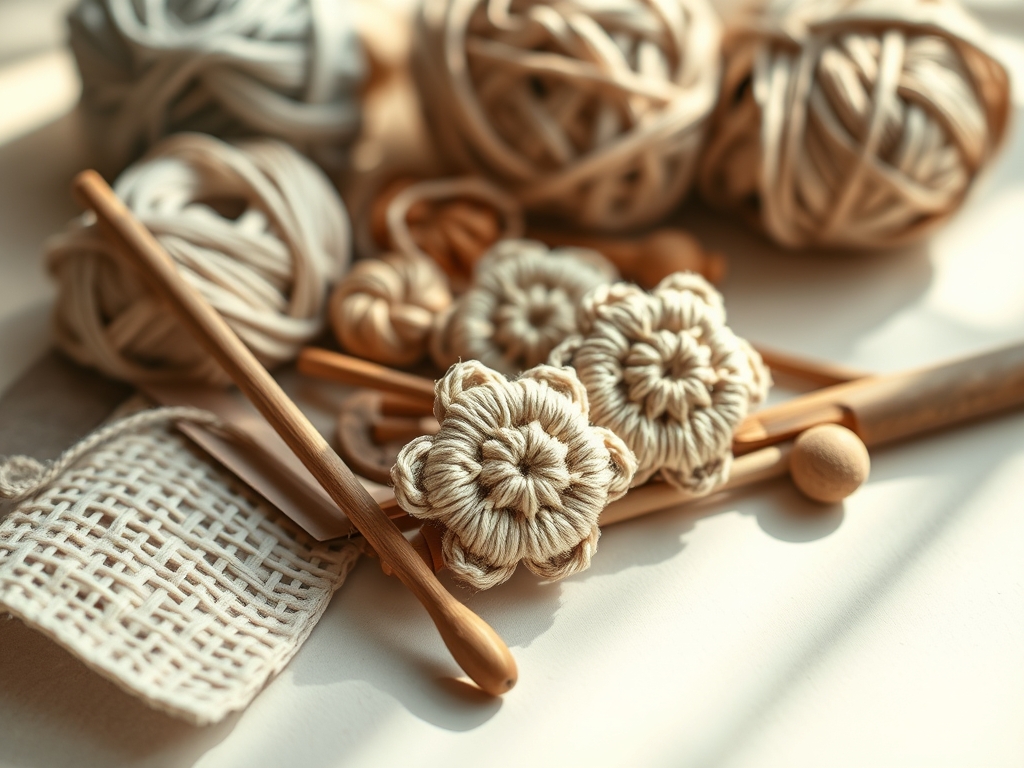
To achieve professional results, your toolkit must prioritize ergonomics and material compatibility. I recommend a set of ergonomic aluminum hooks or tapered steel hooks if you are working with fine lace weights. The hook size must correspond to the yarn's gauge to ensure the stitch density prevents the stuffing or backing from showing through. You will also need a pair of precision embroidery scissors with high-carbon steel blades for clean snips that prevent fiber crushing. A set of calipers can be surprisingly useful here to measure the diameter of your petals, ensuring mathematical symmetry across a set of accessories.
For the yarn, look for a four-ply worsted weight or a double-knit cotton. Cotton is preferred over acrylic because it possesses a lower elasticity; this lack of "give" means your Simple Crochet Flowers will hold their structural shape over time without sagging. If you are feeling adventurous, consider Material Substitutions like raffia for a rustic, high-friction texture or silk thread for a high-sheen, low-friction finish. Always keep a tapestry needle with a large eye but a blunt point nearby to weave in ends without piercing the actual fiber strands, which preserves the integrity of the yarn's twist.
THE TEMPO
The "Maker's Rhythm" is a psychological state where the repetitive motion of the hook creates a consistent tensile load on the yarn. For these simple patterns, the time investment is minimal, making them the perfect "interstitial project."
Phase one is the Foundation Setup, taking approximately two minutes. This involves the magic ring or chain loop where you establish the center of gravity for the flower. Phase two is the Petal Expansion, which takes five to seven minutes. During this stage, your speed will increase as the muscle memory of the stitch repeat takes over. The final phase is the Finishing and Burnishing, taking three minutes. This is where you weave in the tails and manually manipulate the petals to "set" the stitch memory. Total production time per unit is roughly ten to twelve minutes, allowing you to produce a full bouquet in a single studio session.
THE CORE METHOD
1. The Five-Petal Pop
Start with a magic ring to ensure the center hole can be tightened to zero clearance. Work five sets of (one single crochet, two double crochets, one single crochet) into the ring. Mastery Tip: The science of the magic ring relies on friction-locking. By pulling the tail, you are increasing the radial pressure on the stitches, which prevents the center from expanding under the weight of the petals.
2. The Layered Rosette
This design uses a long chain base that is coiled into a spiral. Work a row of V-stitches, then fill each V with five high-profile treble crochets. Mastery Tip: As you roll the strip, use a bone folder or your thumb to press the base of the stitches. This creates a mechanical "set" in the fibers, helping the rose maintain its spiral volume without excessive sewing.
3. The Minimalist Daisy
Create a small center circle in a contrasting color, then join your petal yarn. Use chain loops of five stitches each, anchored by slip stitches. Mastery Tip: Pay attention to the surface tension of your chains. If the chains are too tight, the petals will curl inward; if too loose, they will lose their structural rigidity and flop.
4. The Puff Stitch Bloom
Utilize the puff stitch to create a 3D effect. Pull up multiple loops in a single stitch to create a dense, air-trapping cluster. Mastery Tip: The puff stitch is an example of volumetric density. To keep them uniform, ensure your hook is held at a consistent 90-degree angle to the work to keep all loops at the exact same height.
5. The Scalloped Edge Violet
Work in a continuous spiral for the center, then transition to "shell" stitches for the border. Mastery Tip: Use a rotary cutter to trim any stray fibers from the yarn before you start. This ensures the definition of the scalloped edge remains sharp and the light reflects cleanly off the stitch definition.
6. The Picot Point Lily
Incorporate a picot stitch (a three-chain loop closed with a slip stitch) at the peak of every petal. Mastery Tip: The picot acts as a structural gusset. It adds a point of high-density stitching that reinforces the tip of the petal, preventing it from blunting or fraying during heavy use on accessories like bags.
7. The Flat-Lay Sunflower
Focus on a large, textured center using the popcorn stitch followed by a halo of elongated petals. Mastery Tip: When working the popcorn stitch, you are essentially creating a structural knot. Ensure you drop the loop and re-insert the hook correctly to pull the mass forward; this creates a focal point with high tactile relief.
THE TECHNICAL LEDGER
To ensure the Longevity of your Simple Crochet Flowers, you must consider the environmental impact on the fibers. Natural fibers like wool and cotton are porous and can absorb oils from your skin, which may lead to degradation over years. I recommend a light spray of fabric stiffener or a diluted PVA glue solution on the back of the flowers to provide a chemical "skeleton" that maintains the shape.
Material Variations: For a sustainable approach, use recycled sari silk or hemp cord. Hemp has incredible abrasion resistance, making it ideal for accessories that will face high-friction environments, like keychains. For a premium feel, mercerized Giza cotton offers the highest luster due to its long-staple fibers.
The Correction:
- The Gap: If the center hole is visible, you didn't use a magic ring. Fix: Use a darning needle to weave a "cinch" thread around the base and pull tight.
- The Curl: Petals curling excessively indicates your tension is too high. Fix: Switch to a hook 0.5mm larger.
- The Slump: Flower won't stand up. Fix: You likely used a low-ply yarn. Double the strand (crochet with two threads) to increase the moment of inertia of the fabric.
Studio Organization: Store your finished flowers in a cool, dry place away from direct UV light to prevent photodegradation of the dyes. Use acid-free tissue paper between layers to prevent the fibers from interlocking and "felting" together prematurely.
THE FINAL REVEAL
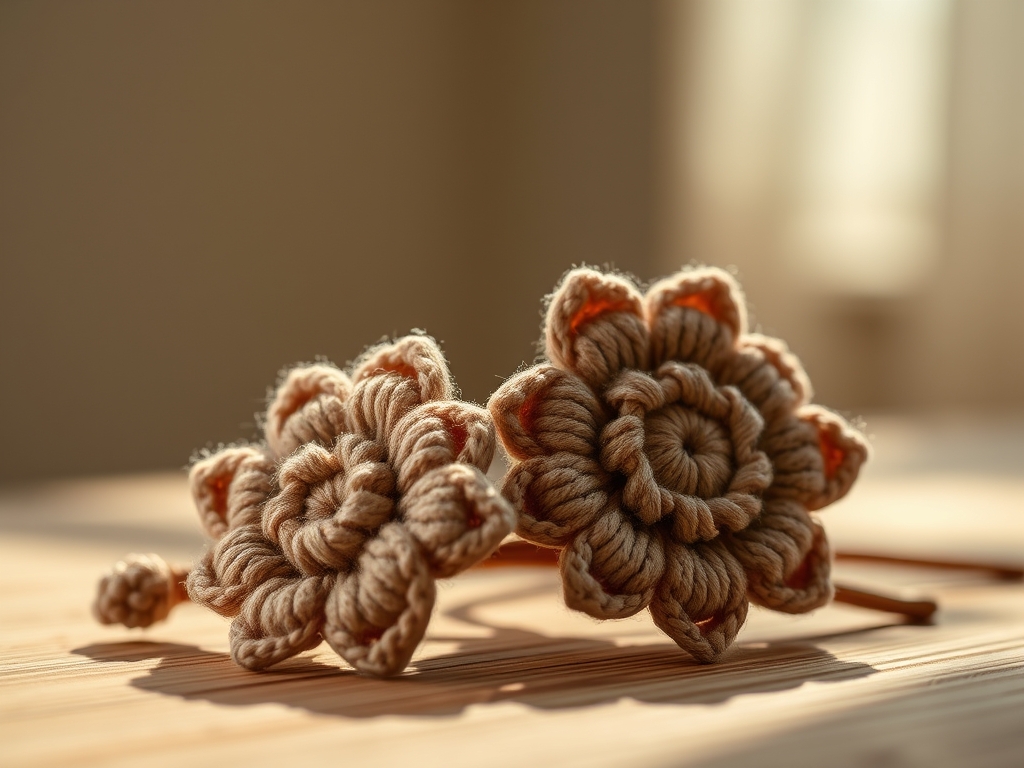
Look at that! You have successfully navigated the physics of fiber to create a stunning array of Simple Crochet Flowers. The way the light hits the ridges of those double crochets is nothing short of a geometric triumph. Your accessories are no longer just "handmade"; they are engineered. These flowers possess the perfect balance of tensile strength and aesthetic grace, ready to be pinned, sewn, or glued onto any surface. The vibrant colors and crisp edges are a testament to your mastery of tension and tool selection. Go ahead and flaunt your botanical creations; you have earned the title of a true maker!
STUDIO QUESTIONS
What is the best yarn for flower structural integrity?
Mercerized cotton is the gold standard. Its unique treatment increases fiber density and reduces elasticity, ensuring that the petals hold their shape and resist sagging over time, even when used on high-movement accessories like hats or bags.
How do I prevent my crochet flowers from fraying?
Use a sharp oscillating tool or precision scissors for clean cuts. For synthetic yarns, a quick pass with a heat source can cauterize the ends. For natural fibers, weave tails back through at least three inches of stitching to maximize frictional hold.
Can I make these flowers waterproof?
While yarn is inherently absorbent, you can apply a specialized hydrophobic fabric spray. This coats the porous fibers in a microscopic layer of silicone, allowing water to bead off without affecting the tactile softness or the visual appeal of the stitches.
Why do my petals look uneven?
Uneven petals usually stem from inconsistent hook velocity and tension. If you change your grip or posture mid-project, the gauge shifts. Using a set of calipers to check the petal width periodically will help you maintain mathematical symmetry.
How do I attach these to hard surfaces?
For non-fabric surfaces, use a high-viscosity cyanoacrylate or a hot melt adhesive with high shear strength. Ensure the back of the flower is flat; you can achieve this by lightly pressing the finished piece with a warm iron to "kill" the fibers.

