
Imagine the smell of ozone and the sharp, clean scent of flux as it hits a warm metal surface. You are sitting at your desk, heart racing just a little, holding a torch that feels like a magic wand. This is the moment where raw silver wire transforms into a permanent treasure. Mastering Beginner Jewelry Soldering is not just about heat; it is about controlling the molecular dance of atoms under a flame.
The tactile sensation of metal resisting your jeweler's saw, followed by the buttery softness of a freshly annealed ring, is a sensory high that never gets old. We are diving into the physics of fire and the chemistry of capillary action. You are about to turn your workspace into a miniature foundry, and I am here to make sure you do it with the precision of a scientist and the flair of a master artisan. Grab your safety glasses and let us get into the grit of the craft.
THE STUDIO KIT
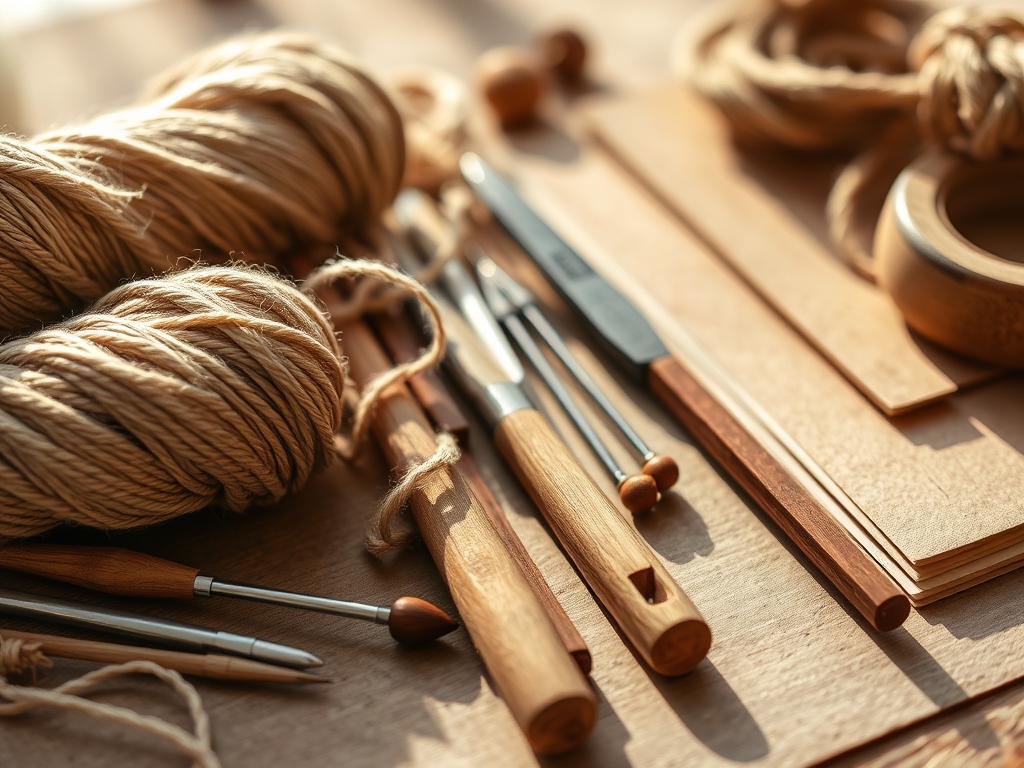
To begin your journey, you need a kit that respects the laws of thermodynamics. Your primary tool is a butane torch, which provides a concentrated flame capable of reaching temperatures over 2,400 degrees Fahrenheit. You will also need a honeycomb soldering block, which is a ceramic surface designed to reflect heat back into your piece rather than absorbing it. This thermal efficiency is crucial for small desk setups where heat management is everything.
Your materials include silver or copper wire in various gauges, typically 16 or 18 for beginners to ensure structural integrity. You will need hard, medium, and easy solder, which are alloys designed to melt at progressively lower temperatures. For precision, keep a pair of fine tipped tweezers and a titanium soldering pick nearby. If you lack a professional pickle pot for cleaning oxide, a slow cooker or a glass jar with a warm citric acid solution acts as a perfect Material Substitution. Do not forget your calipers for measuring precise lengths; even a fraction of a millimeter can ruin the fit of a bezel.
THE TEMPO
The Maker's Rhythm is a three phase cycle: Preparation, Execution, and Finishing. The Preparation Phase takes about twenty minutes. This involves filing your joins until they are light tight, meaning no light passes through the seam when held up to a lamp. This is the most critical part of the process because solder cannot bridge gaps.
The Execution Phase is the shortest but most intense, lasting only about two to five minutes per join. This is where you apply flux, position your solder pallions, and bring the metal up to temperature. Finally, the Finishing Phase takes approximately thirty minutes. This involves quenching the metal in water, pickling it to remove fire scale, and using a rotary tool or sandpaper to buff the surface to a mirror shine. Total time for a single project usually clocks in at sixty to ninety minutes.
THE CORE METHOD
1. The Perfect Flush Fit
Before you even touch the torch, your metal ends must be perfectly flat and flush. Use a jeweler's saw with a 2/0 blade to cut your wire, then refine the edges with a #2 cut hand file. The goal is to maximize the surface area for the solder to bond.
Mastery Tip: The science here is all about tensile strength. A solder joint is only as strong as the contact point. If there are gaps, the solder will pool rather than flow, creating a brittle join that will snap under the slightest pressure.
2. Degreasing and Fluxing
Oil from your skin acts as a barrier to heat. Scrub your metal with a pumice paste or dish soap before applying flux. Flux is a chemical agent that prevents oxidation at high temperatures, allowing the solder to flow smoothly across the surface.
Mastery Tip: Flux works through chemical reduction. It breaks down metal oxides that form when copper or silver is heated, ensuring the molten solder can actually "wet" the surface of the base metal.
3. Tension and Placement
Place your solder pallions (tiny chips of solder) directly under or on top of the seam. If you are working on a ring, use the tension of the metal to hold the join together. The metal should be "spring loaded" so that the ends press firmly against each other.
Mastery Tip: This relies on capillary action. Just like water climbing up a straw, molten solder is drawn into tight spaces through surface tension. If the gap is too wide, the tension breaks and the solder stays in a ball.
4. The Pre-Heat Dance
Never point your torch directly at the solder first. Move the flame in a circular motion around the entire piece. You want the whole object to reach the "critical temperature" simultaneously. Watch for the flux to turn clear and glassy.
Mastery Tip: Metals are excellent thermal conductors. By heating the entire piece, you prevent the heat from being wicked away from the join by the cooler parts of the metal.
5. Chasing the Heat
Once the metal is hot enough, the solder will melt. Solder follows heat. If you want the solder to move through a join, pull the flame toward the back of the piece. The solder will literally "chase" the torch.
Mastery Tip: This is a demonstration of thermal gradients. Molten alloys naturally move toward the point of highest caloric energy. Use this to guide the flow exactly where you want it.
6. The Quench and Clean
As soon as the solder flows, remove the heat. Use tweezers to drop the hot metal into a bowl of room temperature water. This "quenches" the metal, stopping the molecular movement and locking the join in place.
Mastery Tip: Quenching also helps break up fire scale, which is a layer of cupric oxide. The sudden contraction of the metal during cooling causes the brittle oxide layer to flake off.
7. The Acid Bath
Place your piece in the pickle solution for five to ten minutes. This acidic environment removes the remaining flux and oxidation, revealing the bright, clean metal underneath. Use copper tongs only; steel tweezers will cause an electrochemical reaction that plates your silver with copper.
Mastery Tip: This is an ion exchange process. The acid dissolves the copper oxides while leaving the noble silver atoms intact.
8. Burnishing and Finishing
After pickling, your metal will be "dead soft" because it has been annealed. Use a steel burnish tool or a tumbling machine to compress the surface molecules, making the metal hard and shiny again.
Mastery Tip: This is called work hardening. By physically compressing the crystalline lattice of the metal, you increase its durability and resistance to bending.
THE TECHNICAL LEDGER
Maintenance & Longevity: Keep your soldering area free of dust. Wipe down your honeycomb block after every use to prevent "pits" from forming. Store your flux in a sealed container to prevent evaporation, as dry flux will not protect the metal effectively.
Material Variations: While sterling silver is the standard, consider using recycled silver for a sustainable studio practice. It has the same melting point but reduces the environmental impact of mining. For premium work, 14k gold solder can be used on silver to create a "two tone" look with high contrast.
The Correction:
- Solder Balls Up: This happens if the metal is dirty or the solder was heated before the base metal. Fix: Pickle the piece, re-sand the join, and apply fresh flux.
- Pitting in the Join: This is caused by overheating the solder until the zinc boils out. Fix: File the join out entirely and re-solder with a lower temperature alloy.
- The Join Won't Close: This is a mechanical failure. Fix: Use a rawhide mallet to reshape the piece on a mandrel until the ends are perfectly flush.
Studio Organization: Store your solder in labeled jars according to melting point (Hard, Medium, Easy). If they get mixed up, you will ruin complex pieces by melting previous joins. Use a magnetic strip to hold your tweezers and awls to keep your desktop clear of clutter.
THE FINAL REVEAL
Look at that! You just turned a chaotic dance of fire and chemistry into a solid, shimmering piece of wearable art. The join is invisible; the metal is bright; and the structure is sound. There is a specific kind of pride that comes from knowing you controlled the very atoms of your material to create something beautiful. Your desk is no longer just a place for a laptop; it is a high energy laboratory where you are the lead scientist.
STUDIO QUESTIONS
What is the best torch for a small desk?
A butane micro torch is ideal for Beginner Jewelry Soldering at a desk. It is portable, easy to refill, and provides enough heat for small rings, earrings, and pendants without requiring bulky oxygen tanks or specialized ventilation.
Why does my solder turn black?
Solder turns black due to oxidation when the metal is heated without enough flux or if the flame is held in one spot too long. This creates a thick layer of fire scale that prevents the solder from flowing correctly.
Can I solder silver to copper?
Yes, you can solder silver to copper using silver solder. Because copper has a higher melting point than silver, it acts as a stable base. This is a great way to experiment with mixed metal designs and textures.
How do I know when the metal is hot enough?
Watch the flux. It will first bubble, then turn white and crusty, and finally melt into a clear, watery liquid. When the metal itself takes on a dull cherry red glow in dim light, it is ready.
Is jewelry pickle dangerous?
Standard jeweler's pickle is a mild acid. While not instantly corrosive to skin, it can irritate eyes and damage clothing. Always use copper tongs and wear safety glasses to prevent splashes while neutralizing the acid in a baking soda bath.

