
Close your eyes and listen to that specific sound. It is the rhythmic, satisfying slide of waxed thread pulling through a perfectly punched hole. When you first touch a hide of vegetable tanned leather, you are feeling a complex network of collagen fibers that have been preserved through a chemical transformation. This is the foundation of Beginner Leather Stitching. It is not just about making a wallet; it is about mastering the tensile strength of a natural substrate. You can feel the density variations across the surface, where the shoulder of the hide offers a tight, resilient grain compared to the more pliable belly. As your fingers trace the smooth, porous surface, you are essentially reading the history of the animal. We are about to take that raw, organic material and turn it into something architectural. Grab your coffee, because we are diving deep into the physics of the stitch. We are going to treat every puncture like a structural engineering feat. It is tactile, it is slightly addictive, and it is the ultimate way to marry utility with high-end aesthetic.
THE STUDIO KIT
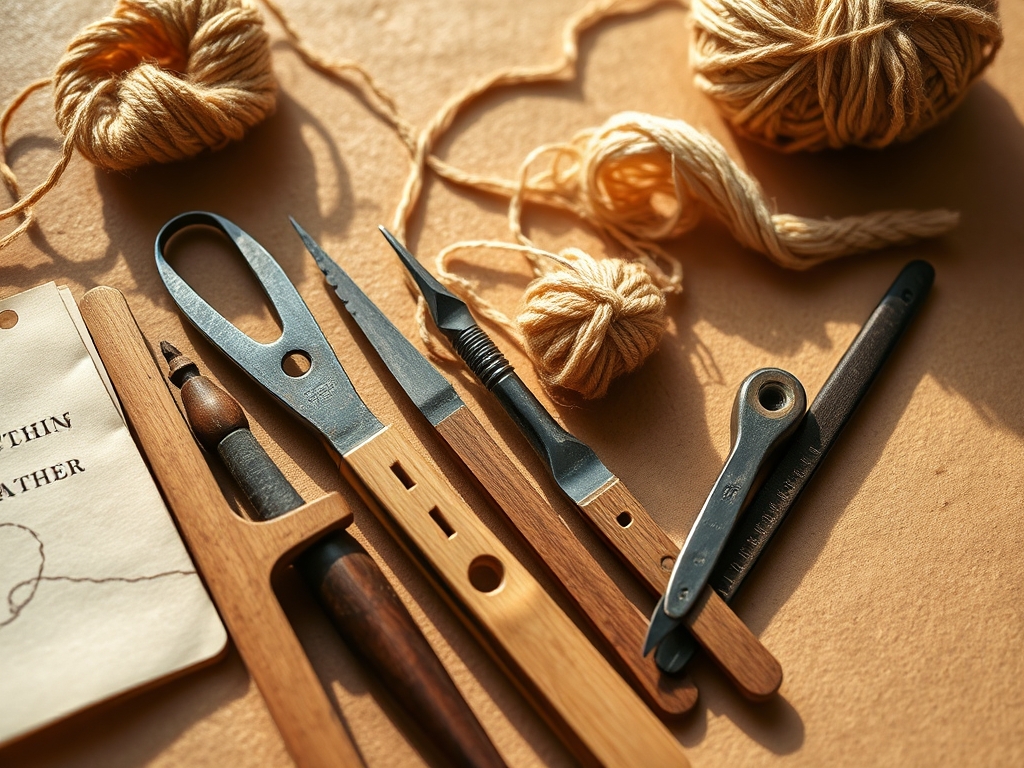
To master Beginner Leather Stitching, you need a kit that respects the material physics of the hide. First, you need a Polymer Mallet. Never use metal on your punches; the shock absorption of poly prevents the mushrooming of your steel tools and ensures a clean transfer of kinetic energy. Second, get a set of Diamond Chisel Punches. These are not just forks; they are precision-ground blades designed to create angled slits that allow thread to lay in a beautiful, slanted "cast." Third, you need Harness Needles. Unlike sewing needles, these have blunt tips because we have already created the path; we are simply threading the needle through an existing void.
Fourth, grab some Braided Polyester Thread. Natural linen is beautiful, but polyester has superior tensile strength and resistance to rot. Fifth, you must have a Wing Divider. This tool uses a fixed pivot to scratch a perfectly parallel line along the edge of your leather, acting as a topographical guide for your stitches. Finally, the Edge Beveler is essential for removing the 90 degree corner of the leather edge, which reduces friction and prevents the grain from "mushrooming" over time.
Material Substitutions: If you cannot find a professional granite slab for a punching surface, a heavy marble pastry board works wonders to provide the "dead blow" effect. No specialized thread wax? A block of pure beeswax will lubricate your cord and seal the fibers against moisture.
THE TEMPO
The "Maker's Rhythm" is a real psychological state where your heart rate syncs with the strike of the mallet. For a standard card holder, expect the following timeline. The Preparation Phase (cutting and marking) takes about 20 minutes. This is a slow, deliberate stage where precision prevents wasted material. The Punching Phase is the loudest and fastest, taking roughly 10 minutes of high-intensity focus.
The Stitching Phase is the marathon. For a six inch seam, allow 30 to 40 minutes. This is where the "tempo" matters. If you rush, your tension will be inconsistent, leading to a puckered edge. Finally, the Finishing Phase (burnishing and polishing) takes 15 minutes. Total time? About 90 minutes of pure, meditative construction.
THE CORE METHOD
1. Scribing the Stitch Line
Use your wing dividers to set a distance of 3mm to 4mm from the edge. Press the guide leg against the leather edge and pull the scribe leg toward you. This creates a shallow groove in the grain layer.
Mastery Tip: This groove is not just for aesthetics; it "seats" the thread below the surface of the leather, protecting it from abrasion and increasing the lifespan of the seam through mechanical recessing.
2. Executing the Punctures
Place your leather on a high-density poly cutting mat. Align your diamond chisel vertically in the scribed groove. Strike the mallet with a single, firm blow.
Mastery Tip: Always overlap the first tooth of your chisel into the last hole of the previous strike. This ensures perfect "spatial frequency" and alignment, maintaining the structural integrity of the leather "bridge" between holes.
3. The Saddle Stitch Sequence
Thread two needles on opposite ends of a single length of thread. Pass one needle through the first hole until the thread is centered. Pass the left needle through the next hole, then pass the right needle through that same hole, crossing over the first thread.
Mastery Tip: This creates a "locking" stitch. Unlike a sewing machine lockstitch, if one thread breaks in a saddle stitch, the other remains intact due to the friction of the overlapping loops within the hole.
4. Managing Tension
After every stitch, pull both needles away from the leather with equal force. You want the thread to be snug but not so tight that it compresses the leather fibers into a "waist" shape.
Mastery Tip: Leather is an elastic medium. If you over-tension, you trigger "creep," where the leather permanently deforms over time, leading to a wavy, unprofessional edge.
5. Backstitching and Locking
Once you reach the end of your seam, stitch backward for two or three holes. Trim the thread close to the surface and use a lighter to carefully melt the polyester tip.
Mastery Tip: Use the flat side of your bone folder to press the melted nub into the hole. This creates a mechanical "rivet" that prevents the thread from unravelling under stress.
6. Edge Burnishing
Apply a small amount of water or tragacanth gum to the beveled edges. Rub the edge vigorously with a wooden burnisher until it turns dark and glossy.
Mastery Tip: This process uses friction to generate heat, which realigns the collagen fibers and fuses them together. It creates a localized "plasticization" that seals the edge against the elements.
THE TECHNICAL LEDGER
Maintenance & Longevity: Keep your steel tools dry. A light coating of camellia oil prevents oxidation. For your leather pieces, avoid silicone-based cleaners; use a pH-balanced leather balm to maintain the lipid content of the fibers.
Material Variations:
- Sustainable: Cork "leather" or Pinatex (pineapple fiber) offer high tensile strength but require smaller needle gauges.
- Recycled: Bonded leather is made from scraps but lacks the long-chain fiber structure of top-grain hides; treat it gently.
- Premium: Shell Cordovan is the "gold standard," sourced from a specific muscle layer in a horse hind, offering zero stretch and incredible density.
The Correction:
- Mistake: The thread is "shredding" as you stitch. Fix: Your hole is too small for your thread gauge; switch to a thinner thread or a larger chisel.
- Mistake: The stitch line is wavy. Fix: Ensure your wing divider is locked tight. If the line is already punched, use a bone folder to "massage" the leather fibers back into alignment.
- Mistake: The leather is "puckering" at the seam. Fix: You are using too much tension. Back out the stitches and re-do them with a lighter touch.
Studio Organization: Store your leather flat in a climate-controlled area. UV light will "tan" vegetable tanned leather prematurely, changing its color. Store your needles in a magnetized tray to prevent loss and maintain the sharpness of your awls by stropping them on a piece of scrap leather loaded with polishing compound.
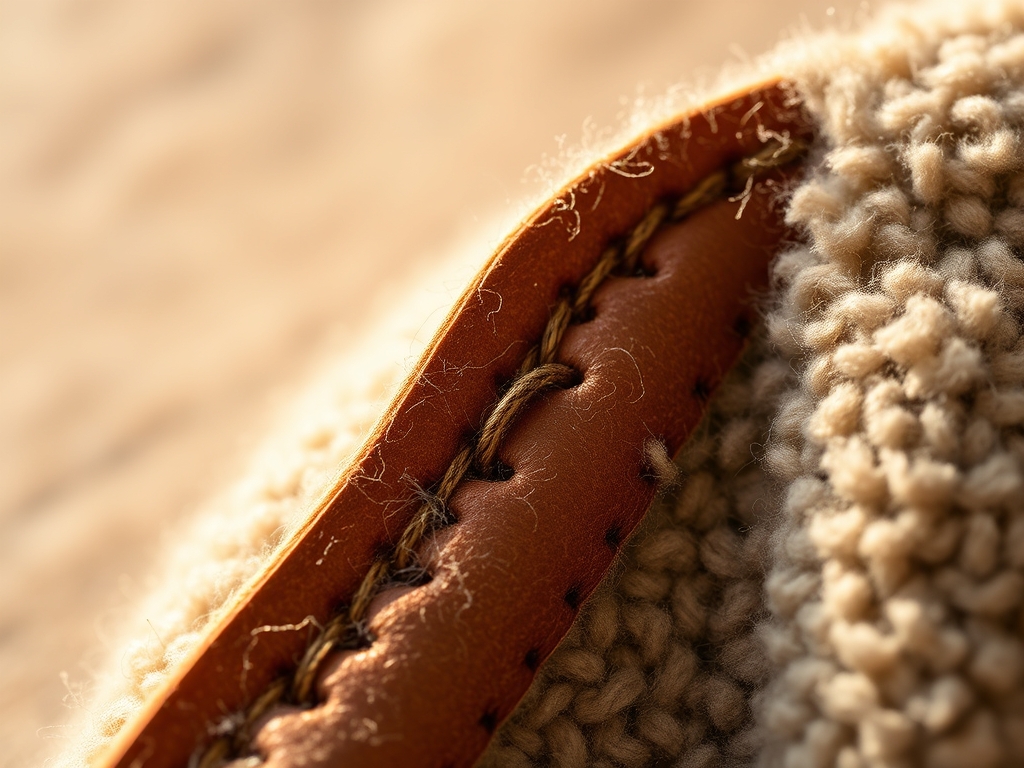
THE FINAL REVEAL
Look at that! You have transitioned from a pile of raw hide to a structured, professional piece of gear. The way the light catches the slanted stitches is a hallmark of quality that no machine can replicate. Your edges are glassy, your tension is uniform, and the piece feels substantial in your hand. This is the magic of Beginner Leather Stitching. You have successfully manipulated organic chemistry and mechanical physics to create something that will likely outlive you. It is sturdy, it is chic, and it carries the "soul" of the maker in every puncture.
STUDIO QUESTIONS
What is the best leather for beginners?
Vegetable tanned leather is best because it is firm, holds a crease, and reacts well to tools. It has a stable fiber structure that makes it much easier to punch and stitch than floppy, chrome-tanned garment leathers.
How do I choose the right thread size?
For most small goods, a 0.6mm or 0.8mm thread is ideal. It provides enough bulk to fill the hole created by a 3.0mm or 3.85mm chisel without looking chunky or straining the leather fibers during the stitching process.
Why are my stitches straight instead of slanted?
This usually happens if you use a round scratch awl instead of a diamond-shaped chisel. The diamond shape forces the thread into an offset orientation, which creates that classic, high-end slanted look synonymous with traditional hand-stitching techniques.
Can I stitch leather without a stitching pony?
Yes, but it is difficult. A stitching pony acts as a third hand, clamping the leather so you can use both hands to manage needle tension. Without one, you risk inconsistent tension and hand fatigue during long stitching sessions.

