
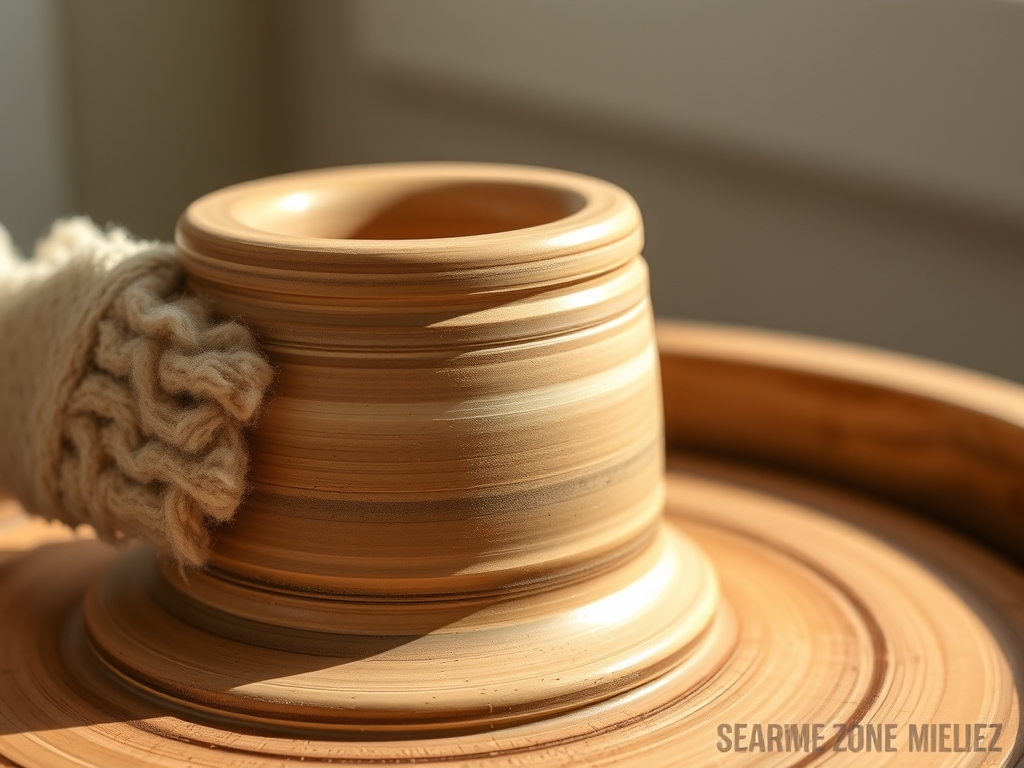
Imagine the cool, damp weight of a three pound ball of stoneware resting in your palms. It is heavy; it is silent; it is a dense mass of minerals and water waiting for a spark of kinetic energy. When you approach your First Time Pottery Wheel session, you are not just making a bowl; you are engaging in a high stakes negotiation with physics. The clay is a thixotropic substance, meaning it acts like a solid when still but flows like a liquid when under stress. As you sit down, the smell of damp earth fills the studio, and the hum of the electric motor vibrates through your stool. You are about to transform a raw, porous lump into a structural marvel. To succeed, you must understand that your body is the most important tool in the room. Your skeletal alignment provides the resistance, while the spinning wheel provides the force. It is a dance of friction and fluid dynamics that starts the moment your wet hands touch the spinning surface.
THE STUDIO KIT
THE STUDIO KIT
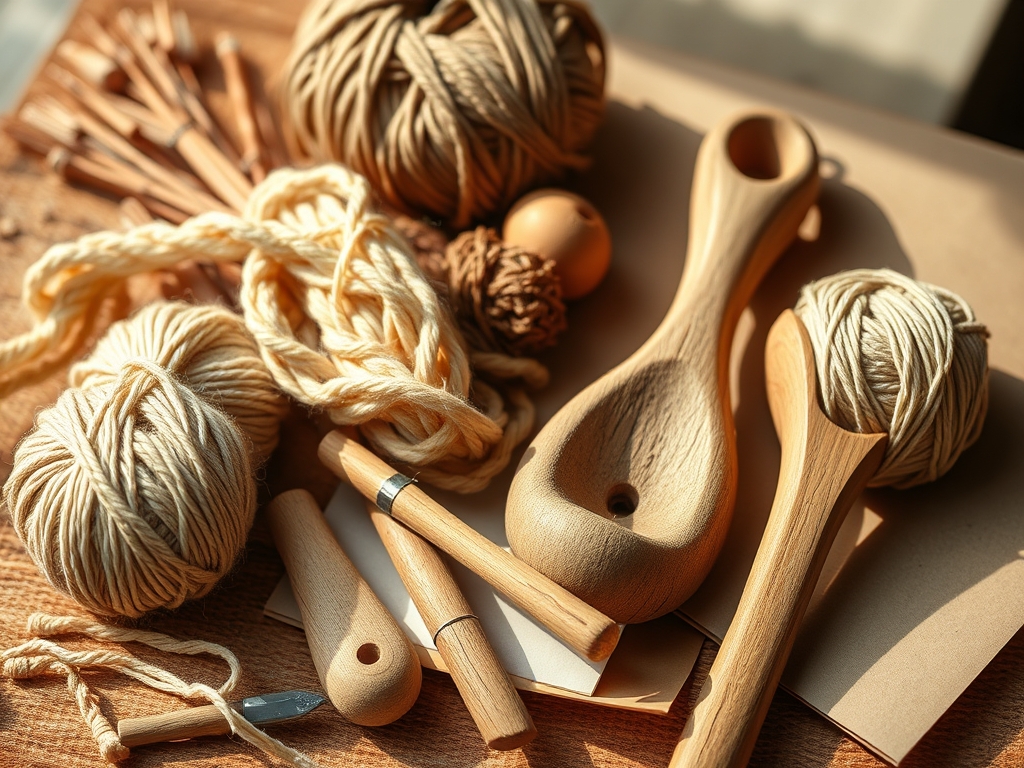
To master the wheel, you need a kit that respects the tensile strength of the clay. You will start with a high quality stoneware or porcelain blend. Stoneware is more forgiving for beginners because it contains grog, which consists of pre fired clay particles that act like a structural skeleton. This prevents the piece from collapsing under its own weight. You will also need a stainless steel scraper to manage the slurry, a sponge for moisture control, and a wire cutter to release the finished piece. Professional potters often use calipers to measure the diameter of the rim, ensuring the walls are symmetrical and the gauge of the clay is consistent from top to bottom.
If you find yourself without a professional kit, look for material substitutions. A stiff plastic credit card can replace a metal rib for smoothing the exterior. A piece of high tension fishing line works beautifully as a wire cutter. For a sponge, any dense, fine pored synthetic foam will do. The goal is to have tools that can withstand the constant abrasion of the spinning clay without degrading or snagging the surface.
THE TEMPO
The "Maker's Rhythm" is a specific chronological flow that prevents the clay from becoming oversaturated. If you spend too much time on one phase, the water will break down the capillary action holding the clay particles together, leading to a "slump."
- Preparation and Wedging: 10 minutes. This removes air bubbles and aligns the clay particles.
- Centering: 5 to 8 minutes. This is the most intense physical phase.
- Opening and Pulling: 10 minutes. This creates the interior volume and height.
- Refinement and Trimming: 5 minutes. This is where you use your burnish tools to create a professional finish.
The total active "wet time" should not exceed 30 minutes. Beyond this, the clay loses its structural integrity and becomes a puddle of mud.
THE CORE METHOD
1. The Power of the Wedge
Before the clay even touches the wheel, you must wedge it. This is a process similar to kneading bread but with much more force. You are aiming to create a spiral of clay that is free of air pockets. Even a tiny bubble can cause an explosion in the kiln or a catastrophic wobble on the wheel.
Mastery Tip: Wedging increases the homogeneity of the clay. By aligning the microscopic plate like particles of the material, you ensure that the clay shrinks at a uniform rate during the drying process, preventing cracks.
2. The Anchored Elbows
When you first drop the clay onto the center of the wheel, it will try to throw your hands around. To win, you must anchor your elbows into your thighs or your hip bones. You are using your entire body weight as a stationary brace against the centrifugal force.
Mastery Tip: This is a lesson in static equilibrium. By locking your joints, you become a rigid extension of the wheel frame. This allows you to exert a consistent pressure that forces the clay into the center of the rotating axis.
3. The Coning Technique
To truly center the clay, you must move it up into a cone and then push it back down into a puck. Do this three times. This ensures the clay is centered all the way through the core, not just on the surface.
Mastery Tip: Coning utilizes shear stress to ensure there are no hard or soft spots within the mass. If the density is not uniform, the wall of your pot will eventually thin out unevenly, leading to a collapse.
4. The Karate Chop Opening
Once centered, use your thumb or the side of your hand to press a hole into the middle. Stop about half an inch from the bottom. Then, pull your fingers toward your body to widen the floor of the pot.
Mastery Tip: Keep an eye on the surface tension. If the clay starts to feel "grabby" or sticky, add a drop of water. The water acts as a lubricant, reducing friction so your skin does not tear the delicate clay wall.
5. The Steady Pull
To get height, pinch the clay between your inside and outside fingers and slowly move upward. The wheel should be spinning at a medium speed. If you move too fast, you will spiral the clay; too slow, and you will create a thick "fat" spot.
Mastery Tip: This phase tests the viscoelasticity of the material. You are stretching the clay while it is in a plastic state. Moving your hands in a perfectly vertical line ensures the center of gravity remains over the base.
THE TECHNICAL LEDGER
Maintenance & Longevity
Your wheel requires regular maintenance to prevent the motor from burning out. Always wipe down the splash pan after every session to prevent dried clay from entering the ball bearings. If you use a kickwheel, ensure the flywheel is balanced to avoid rhythmic vibrations that can distort your work.
Material Variations
- Recycled Clay: Often has higher plasticity but can contain "trash" or uneven grit.
- Paper Clay: Contains cellulose fibers that increase the tensile strength, allowing for incredibly thin walls.
- Premium Porcelain: Has a very fine grain size, making it silky but very prone to collapsing if overwatered.
The Correction
- The Wobble: If the rim is uneven, use a needle tool to cut a thin ring off the top while the wheel is spinning. This resets the level.
- The S Curve: If the bottom cracks during drying, it is usually because you left water sitting in the base. Always sponge the interior bone dry.
- The Slump: If the walls are bowing out, use a heat gun or blow dryer for 60 seconds to stiffen the clay before continuing.
Studio Organization
Store your "greenware" (unfired clay) under a plastic dry cleaning bag. This slows down the evaporation process. If clay dries too fast, the outer edges shrink faster than the core, causing thermal shock or structural fractures before it even hits the kiln.
THE FINAL REVEAL
There is nothing quite like the moment you wire your first piece off the bat. It is heavy, cold, and perfectly symmetrical. You have taken a chaotic lump of earth and, through the application of physics and grit, forced it into a functional form. Look at the interior; see those faint ridges from your fingertips? Those are the "maker's marks," a permanent record of the pressure you applied. Your first piece is a testament to your ability to control a spinning world. It is a win for your hands, your brain, and your kitchen cabinet.
STUDIO QUESTIONS
How do I know if the clay is centered?
Close your eyes and touch the side of the spinning clay. If your hand stays perfectly still without vibrating or bouncing, the mass has reached a state of axial symmetry. It will feel like it is not moving at all.
Why does my clay keep collapsing?
You are likely using too much water. Excessive moisture breaks the ionic bonds between clay particles, causing the material to lose its ability to support its own weight. Use a damp sponge instead of pouring water directly on the piece.
Can I reuse the clay if I mess up?
Absolutely. As long as the clay has not been fired, you can dry it out on a plaster bat and re wedge it. This process is called reclaiming, and it allows you to practice indefinitely without wasting premium materials.
What is the best tool for a beginner?
The wooden rib is your best friend. It acts as an extension of your hand, providing a flat, rigid surface to smooth out the exterior walls and compress the clay, which increases the overall structural density of your piece.

