
Close your eyes and feel that specific, crisp resistance as your thumbnail glides over a fresh sheet of eighty gram paper. There is a hidden geometry waiting inside every square; a structural blueprint that transforms flat cellulose into three dimensional art. If you are looking for simple origami for beginners, you are essentially learning to manipulate the tensile strength of wood fibers through controlled compression. When we fold, we are not just making shapes; we are breaking the internal bonds of the paper along a specific axis to create a permanent hinge. This process is deeply tactile. You can feel the fibers give way as you apply pressure, moving from a state of elastic deformation to plastic deformation. It is a quiet, rhythmic dance between your fingertips and the material. We are going to master the physics of the fold together, turning a humble stack of paper into a fleet of geometric wonders. Grab your favorite seat at the bench, because we are about to turn static sheets into kinetic energy.
THE STUDIO KIT
THE STUDIO KIT
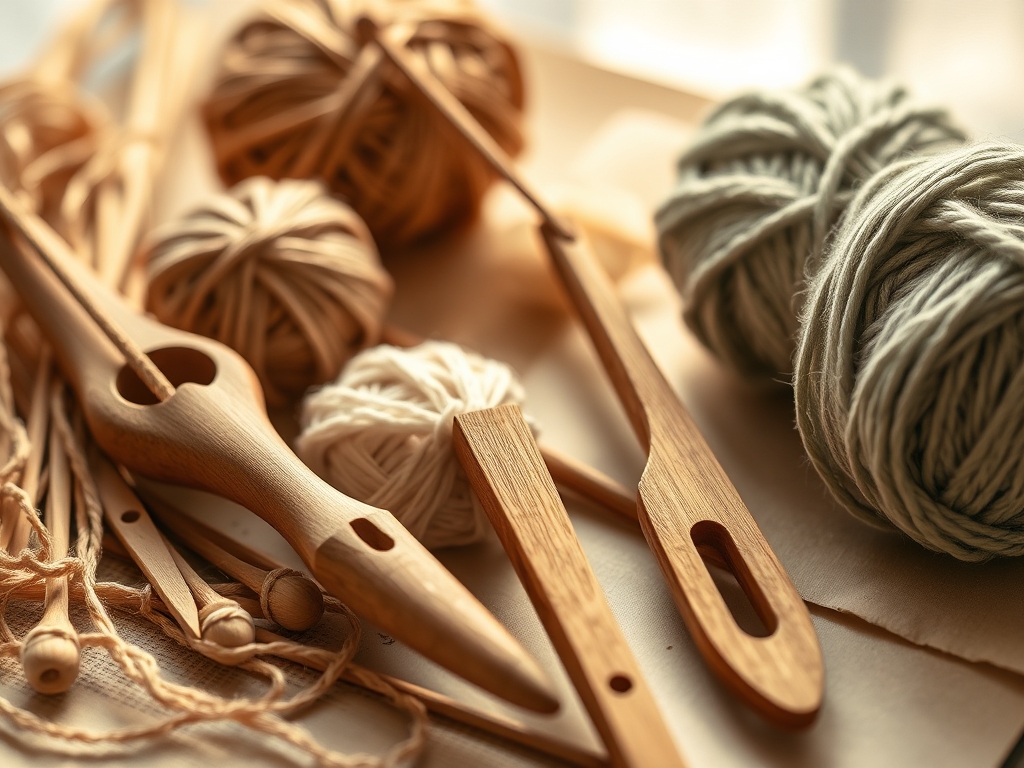
To execute professional grade folds, you need more than just "paper." You need to understand the ply and porosity of your medium. Standard origami paper, known as Kami, is typically 60 to 65 GSM (grams per square meter). This thinness allows for multiple layers to stack without creating excessive bulk that would distort the final dimensions. You will also need a bone folder or a smooth edged burnishing tool to ensure your creases are sharp and permanent. For beginners, a self healing cutting mat provides an ergonomic surface that prevents the paper from sliding during the initial alignment phases. If you find yourself working with heavier cardstock, keep a stylus or a dull awl nearby to pre score your lines; this prevents the outer fibers from cracking and peeling.
Material Substitutions: If you lack professional Kami, reach for high quality parchment or even recycled brown kraft paper. Kraft paper has a high tensile strength due to its long fiber length, making it incredibly resilient for complex folds. Avoid glossy magazine pages initially; the coating creates a slick surface that resists the friction needed for precise finger placement. If you are feeling adventurous, try "washi" paper, which incorporates long plant fibers for a soft, fabric like texture that holds a crease with remarkable structural integrity.
THE TEMPO
The "Maker's Rhythm" is the heartbeat of the studio. For simple origami for beginners, the tempo is divided into three distinct phases. First is the Calibration Phase (2 minutes), where you inspect your paper for perfect squareness. Use your calipers or a precision ruler to ensure all four sides are identical; even a one millimeter deviation will cause cumulative error in later steps. Second is the Execution Phase (5 to 10 minutes per model), where you perform the actual folds. This should be slow and deliberate. Finally, there is the Refinement Phase (2 minutes), where you burnish every edge to lock the shape into place. Do not rush the process. Origami is a study in precision; moving too fast leads to "crease creep," where the paper shifts off center and ruins the symmetry.
THE CORE METHOD
1. The Foundation Valley Fold
Start by folding the bottom edge of your paper to meet the top edge exactly. Align the corners using a "pinch and slide" technique. Once the edges are flush, slide your finger to the center and then out to the sides.
Mastery Tip: This step utilizes linear compression. By pressing the paper, you are crushing the air pockets between the cellulose fibers. A sharp crease creates a mechanical hinge that directs the "memory" of the material.
2. The Mountain Peak Alignment
Flip the paper over and fold the edges inward. Unlike the valley fold, the "mountain" fold creates a ridge that stands toward you. This creates a structural spine for your model, increasing its resistance to gravity.
Mastery Tip: Observe the grain direction of the paper. Paper is easier to fold with the grain than against it. If your fold feels "crunchy," you are likely working against the alignment of the pulp fibers.
3. The Diagonal Tension Bridge
Fold one corner to the opposite corner to create a large triangle. This introduces a 45 degree axis to your workspace. This fold is crucial for models like the classic crane or the jumping frog, as it establishes the lateral stability of the piece.
Mastery Tip: Use your bone folder to apply even pressure. This ensures the crease is uniform across the entire length, preventing "bowing" where the paper curves instead of snapping into a sharp line.
4. The Squash Fold Expansion
Open a pocket of paper and press it flat into a symmetrical diamond shape. This is the first "advanced" move for a beginner, requiring you to manipulate three dimensions simultaneously.
Mastery Tip: This relies on material displacement. You are forcing the paper to occupy a new plane. Ensure your center line remains perfectly vertical to maintain the ergonomic balance of the final shape.
5. The Petal Fold Hinge
Lift the bottom edges of a flap and fold them toward the center crease, then flatten the entire section upward. This creates a long, elegant diamond.
Mastery Tip: This fold tests the shear strength of the paper. Because you are folding multiple layers, the thickness increases. Apply extra pressure at the "pivot point" to prevent the paper from tearing at the stress concentration site.
6. The Inside Reverse Tuck
Push a corner or a point inside the body of the model to create a head or a tail. This hides the raw edges of the paper and creates a clean, professional finish.
Mastery Tip: This is an exercise in geometric inversion. By reversing the direction of an existing crease, you are utilizing the paper's "elastic recovery" to hold the new shape in place without adhesives.
7. The Final Burnish
Once the model is complete, go over every single edge one last time with your burnishing tool. This compresses the final layers and ensures the model will not "spring" open over time.
Mastery Tip: This final compression increases the bulk density of the folds. It turns a loose collection of flaps into a rigid, self supporting structure that can stand on its own.
THE TECHNICAL LEDGER
Maintenance & Longevity: To keep your origami crisp, avoid high humidity environments. Paper is hygroscopic, meaning it absorbs moisture from the air, which can cause your sharp creases to soften and "wilt." Store finished pieces in a cool, dry place.
Material Variations:
- Recycled: Great for practice; high friction helps folds stay put.
- Foil Backed: Holds complex shapes perfectly due to the metal's malleability.
- Washi: High aesthetic value; features "deckled" edges and long fiber inclusions.
The Correction:
- The Dog Ear: If your corners do not meet, your initial square was likely a trapezoid. Use a rotary cutter to re square your stock.
- The Tear: If the paper rips at a junction, you are using too much force on low gauge paper. Switch to a higher GSM or use a lighter touch.
- Crease Creep: If your lines are shifting, you are not holding the paper firmly. Use a small weighted beanbag to hold one side while you fold the other.
Studio Organization: Store your paper flat in acid free portfolios. Use dividers to categorize by weight and texture. This prevents the edges from fraying and keeps the fibers "rested" before you begin your work.
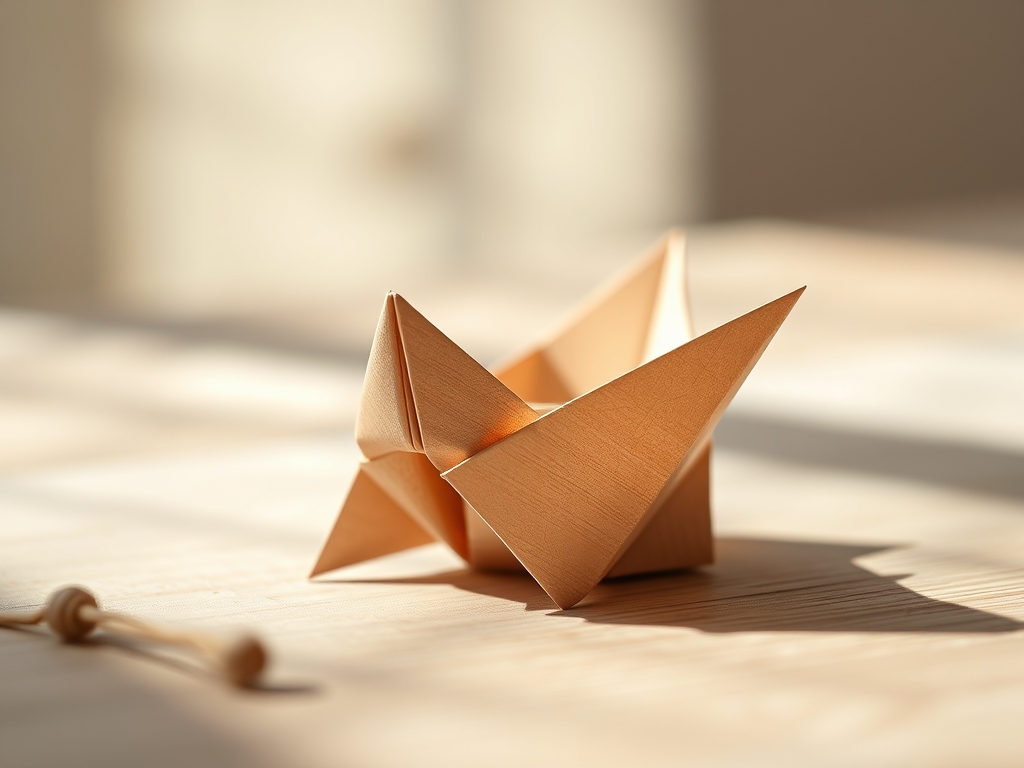
THE FINAL REVEAL
Look at that! You have successfully navigated the physics of the fold. What started as a simple, two dimensional square is now a structured masterpiece held together by nothing but tension and geometry. The way the light hits those sharp, burnished edges is pure magic. You have mastered the basics of simple origami for beginners, and your hands now understand the language of paper. Whether it is a sleek bird or a geometric star, your creation is a testament to precision and patience. It feels sturdy, looks professional, and most importantly, it was made by you.
STUDIO QUESTIONS
What is the best paper for a total beginner?
Standard 6 inch Kami is the gold standard. It is thin enough to fold easily but has enough tensile strength to withstand multiple manipulations without tearing. It usually features a colored side and a white side to help you track your orientation.
Do I really need a bone folder?
While your fingernail works in a pinch, a bone folder provides uniform pressure distribution. This prevents oils from your skin from degrading the paper fibers and ensures a much sharper, more professional crease that won't "spring" back.
Why do my corners never line up perfectly?
This is usually due to "cumulative error." If your first fold is off by even half a millimeter, every subsequent fold will amplify that mistake. Use calipers to check your paper's squareness before you even begin the first fold.
Can I use regular printer paper?
Yes, but it is much heavier (usually 80 to 100 GSM). This makes it harder to perform "squash folds" or "petal folds" because the bulk thickness of the paper creates too much resistance. It is best for very simple models.

