
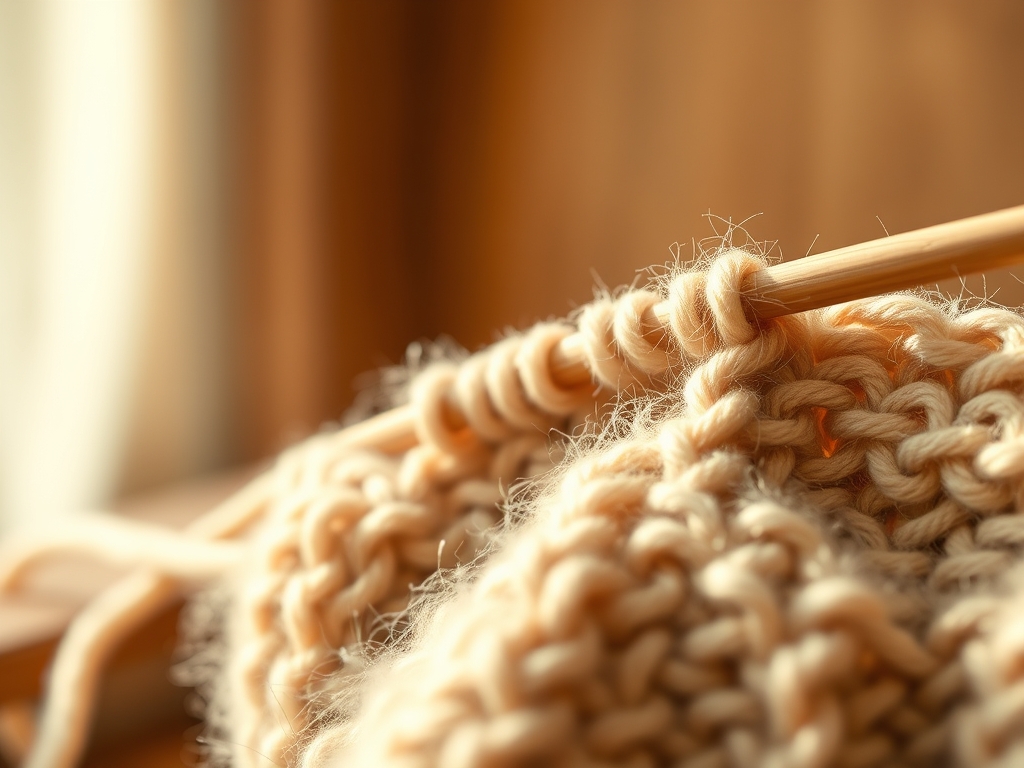
Grab your favorite mug and clear some table space because we are about to dive into the tactile magic of fiber arts. There is nothing quite like the sensory rush of raw wool sliding through your fingers as you master Beginner Knitting Stitches for the first time. It is a physical dialogue between your hands and the tensile strength of the yarn. We are not just making fabric; we are engineering a flexible grid that traps heat through pockets of air. When you first feel that rhythmic click of the needles, you realize you are building a structural masterpiece one loop at a time. The friction of the fibers creates a grip that holds your tension steady; it is pure physics disguised as a cozy hobby.
THE STUDIO KIT
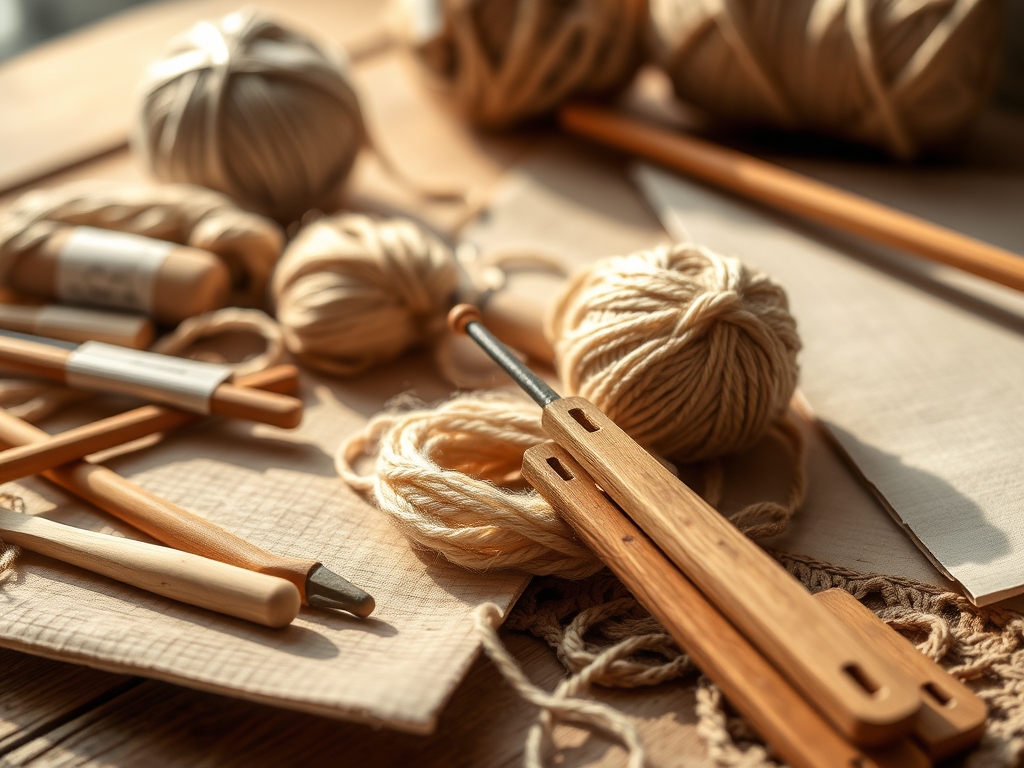
To begin your journey into the world of Beginner Knitting Stitches, you need a kit that respects the science of friction. Your primary tools are a pair of size 8 (5.0mm) needles. While aluminum needles offer a slick surface for speed, I recommend bamboo or wood for beginners. The porous nature of wood provides a natural "grab" on the yarn, preventing your loops from sliding off before you are ready. You will also need a metal tapestry needle for weaving in ends; the polished steel reduces drag against the wool fibers.
For the yarn, look for a worsted weight wool blend. Wool has incredible elasticity, meaning it can stretch up to 30 percent of its length and still snap back to its original shape. This "memory" is what keeps your scarf from looking like a saggy noodle after one wear. If you are looking for Material Substitutions, cotton is a popular choice, but be warned: cotton has zero elasticity. It is a "dead" fiber that will show every single inconsistency in your tension. For a premium upgrade, try a merino and silk blend. The silk adds a high-tensile sheen while the merino provides the bulk needed for warmth. Always keep a pair of precision embroidery scissors and a flexible measuring tape nearby to monitor your gauge as you work.
THE TEMPO
The Maker's Rhythm is a physiological state where your heart rate slows to match the cadence of your needles. For a standard scarf, expect to invest about 15 to 20 hours of active labor. The initial "Cast On" phase takes roughly 20 minutes; this is where you establish the foundation and set the width. The "Growth" phase is the longest, where you repeat your chosen texture for 60 inches. Finally, the "Bind Off" and finishing takes about 30 minutes.
Consistency is the secret to professional results. If you knit while stressed, your stitches will be tight and rigid. If you knit while distracted, they might be loose and sloppy. Aim for a steady "flow state" where each loop is pulled with the same amount of force. Professional knitters often use a digital row counter to track their progress, ensuring that the structural integrity of the pattern remains uniform from start to finish.
THE CORE METHOD
1. The Foundation Cast On
Every project begins with the long tail cast on. This method is superior because it creates a built-in row of knitting that is both sturdy and elastic. You wrap the yarn around your thumb and index finger, creating a slingshot shape, then use the needle to scoop the yarn into a slipknot.
Mastery Tip: This step is all about surface tension. If you pull the loops too tight against the needle, you will struggle to insert the needle on the next row. Leave enough space for a thin wire to pass through the loop.
2. The Garter Stitch (The Foundation)
The Garter Stitch is the simplest of all Beginner Knitting Stitches. You knit every single row. This creates a bumpy, ridged texture that is incredibly squishy. Because the fabric is identical on both sides, it is considered "reversible."
Mastery Tip: The Garter Stitch is structurally stable because the ridges act like miniature springs. This texture resists curling, which is why it is the gold standard for beginner scarves.
3. The Stockinette Stitch (The Classic V)
To achieve that smooth, store-bought look, you must alternate one row of knitting with one row of purling. This creates a flat "V" shape on the front and "purl bumps" on the back.
Mastery Tip: Stockinette has a natural tendency to curl at the edges due to the unbalanced torque of the stitches. Always add a border of Garter stitch to the sides to act as a structural anchor.
4. The Ribbed Stitch (The Elastic Edge)
By alternating knit and purl stitches within the same row (K1, P1), you create vertical columns. This is the most elastic texture in knitting.
Mastery Tip: Ribbing relies on lateral compression. The purl columns recede while the knit columns pop forward, allowing the fabric to expand and contract like an accordion.
5. The Seed Stitch (The Tactile Grain)
The Seed Stitch is created by knitting the purls and purling the knits. This results in a beautiful, pebbled texture that looks like scattered seeds.
Mastery Tip: This texture provides high structural rigidity. It does not stretch as much as ribbing, making it perfect for a scarf that needs to hold its shape over time.
6. The Moss Stitch (The Elongated Grain)
Similar to the Seed Stitch, the Moss Stitch shifts the pattern every two rows instead of every row. This creates a slightly more elongated, woven appearance.
Mastery Tip: The Moss Stitch increases the bulk density of the fabric. It uses slightly more yarn than Garter stitch but provides superior wind resistance.
7. The Basketweave (The Geometric Grid)
By creating small blocks of knit and purl stitches, you can mimic the look of a woven basket. This is a fantastic way to practice "reading" your knitting.
Mastery Tip: This pattern utilizes perpendicular tension. The alternating blocks counteract each other's tendency to lean, resulting in a perfectly flat finished piece.
8. The Slip Stitch Edge (The Pro Finish)
While not a full texture, slipping the first stitch of every row creates a clean, braided edge.
Mastery Tip: Slipping the stitch reduces the vertical height of the edge, preventing the "scalloped" look that often plagues beginner projects. It creates a crisp, architectural finish.
THE TECHNICAL LEDGER
To ensure the longevity of your work, you must understand fiber degradation. Natural wool contains lanolin, which repels water, but excessive washing will strip these oils and cause the fibers to become brittle. Always hand wash your scarves in cool water using a pH-neutral soap.
Material Variations:
If you want to go green, look for recycled wool or Tencel. Tencel is made from wood pulp and has a high tensile strength, though it lacks the warmth of animal fibers. For a luxury feel, Cashmere offers unparalleled softness but requires a tighter gauge to prevent pilling.
The Correction:
- The Dropped Stitch: If a loop falls off, use a crochet hook to "climb" back up the ladder of threads.
- The Split Yarn: If your needle pierces the yarn ply, undo the stitch. A split ply weakens the structural integrity of the fabric.
- The Accidental Increase: If you find extra stitches, you likely wrapped the yarn over the needle by mistake. Simply knit two together (K2Tog) to return to your original count.
Studio Organization:
Store your yarn in airtight bins with cedar blocks to prevent moth damage. Never hang a knitted scarf on a hanger; the gravitational pull will stretch the stitches over time. Instead, fold it loosely and store it flat to maintain its shape.
THE FINAL REVEAL
Look at that! You have successfully navigated the complex physics of Beginner Knitting Stitches. Your finished scarf is more than just an accessory; it is a mathematical grid of interlocking loops that showcases your dedication to the craft. The texture is consistent, the edges are crisp, and the drape is perfectly balanced. You have transformed a single strand of yarn into a three-dimensional textile through the power of your own two hands. Wear it with pride, knowing you have mastered the fundamental engineering of knitwear!
STUDIO QUESTIONS
What is the best yarn for a beginner scarf?
A worsted weight wool or wool-blend is ideal. It has the perfect balance of thickness for visibility and elasticity for tension control. Avoid "eyelash" or textured yarns, as they hide your stitches and make it impossible to track progress.
Why is my knitting getting wider?
You are likely creating "accidental yarn overs" or knitting into the same stitch twice. Ensure your yarn is always in the correct position (front for purl, back for knit) before starting the next stitch to maintain a consistent stitch count.
How do I stop my scarf from curling?
Curling is caused by the structural imbalance of the Stockinette stitch. To fix this, always include a "border" of Garter stitch or Seed stitch (at least 3-4 stitches wide) on all four sides of your project to provide stability.
Can I use different needle sizes for the same yarn?
Yes, but it changes the fabric density. Smaller needles create a stiff, windproof fabric, while larger needles create a loose, drapey lace. For beginners, sticking to the manufacturer's recommended needle size ensures the best structural integrity and ease of use.

