Imagine the sharp, clean scent of freshly sheared pine mingling with the metallic tang of a steel blade. There is a specific, tactile thrill when your fingertips trace the raised grain of a raw board; you can feel the cellular history of the tree in every ridge. We are about to transform that raw potential into something functional. Diving into Simple Woodworking Projects is not just about making a shelf or a box; it is about mastering the physics of wood fibers. Wood is a dynamic, hygroscopic material that breathes with the humidity of your room. When you understand how cells collapse or expand, you stop fighting the material and start dancing with it. In a small studio or a tiny apartment, you do not need a massive table saw to achieve professional results. You need a curated selection of high-quality hand tools and an understanding of how to manipulate the tensile strength of your timber. Let us get your hands dirty and your brain buzzing with the sheer mechanical joy of creation.
THE STUDIO KIT
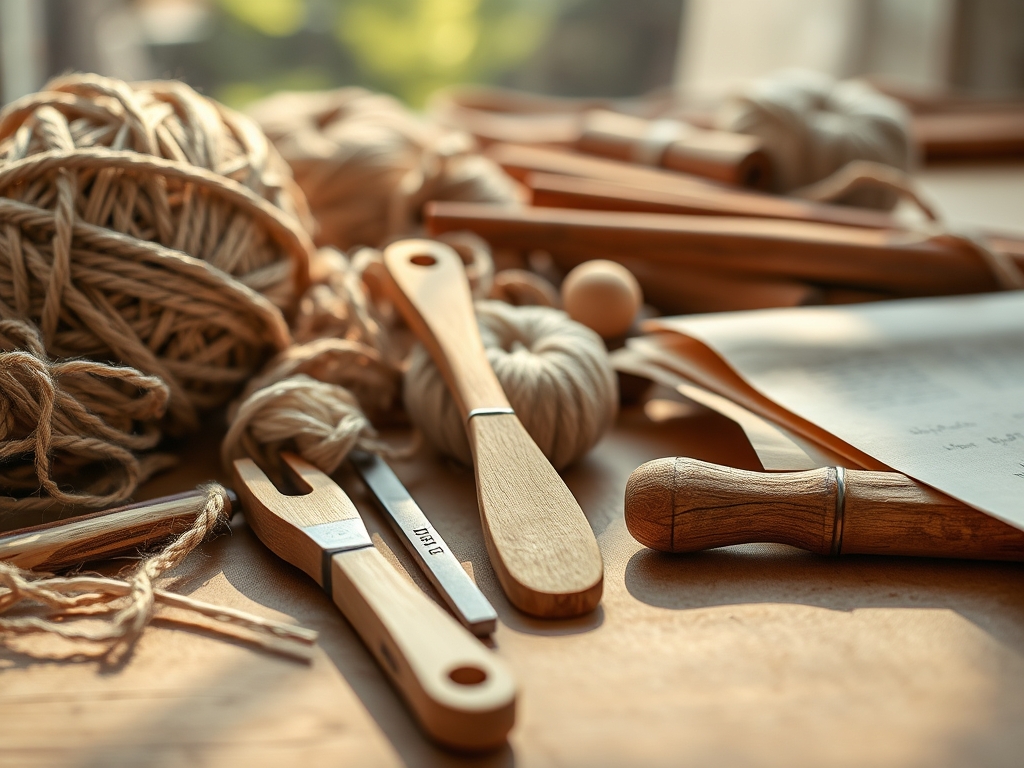
To master Simple Woodworking Projects in a compact footprint, your kit must be lean and high-performance. We focus on tools that offer maximum leverage and precision without requiring a dedicated workshop.
- The Japanese Pull Saw (Ryoba): Unlike Western saws that cut on the push stroke, this saw cuts on the pull. This allows for a thinner blade (kerf), which means less physical effort and a much cleaner finish. The high carbon steel is brittle but incredibly sharp.
- The Combination Square: This is your North Star. It ensures your edges are perfectly perpendicular. A slight deviation of even one degree can cause structural failure in a joint due to uneven weight distribution.
- A Set of Bevel-Edge Chisels: Specifically 1/4 inch and 1/2 inch sizes. These allow you to pare away material with surgical precision.
- The Block Plane: Essential for smoothing end grain and creating chamfers. It manipulates the surface tension of the wood to prevent splintering.
- C-Clamps or F-Clamps: These provide the necessary PSI (pounds per square inch) to ensure wood glue creates a bond stronger than the wood itself.
- The Cordless Drill: For creating pilot holes. Without a pilot hole, the wedge action of a screw will split the grain along its natural cleavage planes.
- Sandpaper Multipack: Grits ranging from 80 (coarse) to 220 (fine).
- Marking Awl: A pencil line has thickness; a scratched line from an awl has none. Precision starts here.
- Wood Glue (PVA): A polymer that penetrates the porous surface of the wood to create a chemical bond.
Material Substitutions: If you cannot find kiln-dried hardwood, look for high-grade birch plywood. While solid wood has a linear grain, plywood uses a cross-laminated structure that offers superior dimensional stability in humid environments.
THE TEMPO
The Maker's Rhythm is a three-phase cycle: Preparation, Execution, and Curing. For a beginner project like a desktop organizer or a plant stand, expect to spend approximately six hours of active labor. However, the rhythm is dictated by the materials.
Phase one is the Milling and Marking (2 hours). This is the cerebral part where you calculate your cuts. Phase two is the Mechanical Shaping (3 hours), where the physical transformation happens. Phase three is the Assembly and Finishing (1 hour active, 24 hours passive). You must respect the "open time" of your adhesives. Rushing a glue-up results in a "starved joint" where the adhesive is squeezed out before it can penetrate the fibers, leading to a weak structure.
THE CORE METHOD
1. The Precision Layout
Use your marking awl and combination square to scribe your cut lines directly onto the wood. Observe the alignment in the step-by-step photos below. Always mark the "waste" side of the line with an X so you do not accidentally cut your piece too short.
Mastery Tip: Wood grain acts like a bundle of drinking straws. When you mark across the grain, you are severing those straws. Using a sharp awl instead of a pencil prevents the "crush" effect and provides a physical track for your saw blade to follow, increasing accuracy by microns.
2. Executing the Pull Cut
Secure your timber to a stable surface using your clamps. Position your Ryoba saw at a 15-degree angle. Start the cut with a light pull stroke to establish a groove. Use long, fluid motions, letting the weight of the saw do the work.
Mastery Tip: The physics of the pull saw relies on the tensile strength of the blade. Because the blade is under tension during the cut, it stays straight and true. If you push too hard, you risk buckling the thin steel. Maintain a light grip to feel the vibration of the teeth.
3. Paring the Joint
If your cut is slightly off, use your bevel-edge chisel to shave away thin curls of wood. This is called paring. Always chisel away from your body and keep your non-dominant hand behind the blade.
Mastery Tip: This process relies on capillary action when you eventually apply glue. A smooth, pared surface allows the adhesive to wick deeper into the wood fibers, creating a monolithic bond. A rough, torn surface creates air pockets that weaken the joint.
4. Boring Pilot Holes
Select a drill bit that matches the inner shank of your screw, not the threads. Drill straight into the wood at the center of your joint.
Mastery Tip: Wood is prone to "hoop stress." When a screw enters without a pilot hole, it forces the fibers apart. By removing a cylinder of waste material first, you allow the threads to cut into the walls of the hole without creating the internal pressure that causes splitting.
5. The Controlled Glue-Up
Apply a thin, even bead of PVA glue to both mating surfaces. Use a small brush or a scrap of wood to spread it. Clamp the pieces together until you see a small, uniform bead of "squeeze-out" appearing along the seam.
Mastery Tip: This squeeze-out is a visual indicator of surface saturation. If no glue emerges, the joint is starved. If a river of glue runs out, you have wasted material and created a mess that will block your wood finish from penetrating later.
6. The Final Burnish
Once the glue is dry (usually 24 hours), sand the piece starting with 80 grit and moving to 220. Wipe away the dust with a tack cloth and apply a food-safe oil or wax.
Mastery Tip: Sanding is essentially creating microscopic scratches. As you move to higher grits, you are making those scratches so small they no longer scatter light. Finishing with a wax and a soft cloth allows you to burnish the surface, compressing the top layer of fibers for a silky, professional feel.
THE TECHNICAL LEDGER
Maintenance & Longevity: Steel tools are susceptible to oxidation. Wipe your saw blades and chisels with a light coat of camellia oil after every session. Keep your chisels sharp; a dull tool requires more force, which leads to accidents and "tear-out" in the wood.
Material Variations:
- Sustainable: Look for FSC-certified pine or reclaimed pallet wood (ensure it is heat-treated, marked HT).
- Premium: Black Walnut or White Oak offer incredible density and beautiful "figuring" but require sharper tools due to their high Janka hardness rating.
The Correction:
- The Gap: If your joint has a gap, mix fine sawdust with wood glue to create a structural filler that matches your wood tone.
- The Split: If the wood cracks, inject glue into the fissure with a syringe and clamp it immediately to "knit" the fibers back together.
- The Wobble: If a table or stand is uneven, do not sand the long leg. Instead, add a small leather or felt shim to the short leg to maintain structural integrity.
Studio Organization: In small spaces, verticality is your friend. Store your wood flat to prevent "bowing" or "cupping" caused by gravity and uneven moisture absorption. Use a magnetic strip for your metal tools to keep them off the work surface and prevent edge degradation.
THE FINAL REVEAL
There is nothing quite like the moment you release the clamps and see your vision standing on its own. Your Simple Woodworking Projects are a testament to your ability to manipulate the physical world with nothing but a few hand tools and your own grit. The finished piece should feel heavy for its size, with joints that look seamless and a surface that begs to be touched. You have successfully navigated the complexities of grain direction and mechanical fasteners. This is not just a hobby; it is a fundamental reclamation of the "maker" identity. Go ahead, run your hand over that smooth, burnished corner. You did that!
STUDIO QUESTIONS
What is the best wood for beginners in small spaces?
Pine or Poplar are ideal. They are soft enough to cut easily with hand tools but possess enough structural integrity for most household projects. Their porous nature also makes them very forgiving during the gluing and staining process.
How do I prevent wood from splitting near the ends?
Always drill a pilot hole. Wood fibers are most fragile at the ends of a board. By removing the internal mass with a drill bit before inserting a screw, you eliminate the outward pressure that causes the grain to separate.
Can I do woodworking without a workbench?
Yes, you can use a sturdy kitchen table or even a heavy coffee table. The key is using "sacrificial" boards underneath your work to protect the surface and using high-quality clamps to keep your project from shifting during cuts.
How do I know if my chisel is sharp enough?
A sharp chisel should be able to shave the hair off your arm or slice through a piece of paper with zero resistance. If it tears the wood fibers instead of slicing them, it is time to hit the sharpening stones.
Why is my wood glue not holding?
The most common reason is "starved joints" or clamping too lightly. You need enough pressure to force the glue into the wood's pores. Also, ensure the surfaces are free of dust, as debris acts as a barrier to adhesion.